Step By Step: Install and Configure Sensu + Grafana
Step By Step: Install and Configure Sensu + Grafana
Written By: Santhosh Kumar, Cloud Engineer, Powerupcloud | Contributors: Logeshkumar Muruganantham, Cloud Engineer, Powerupcloud
We, at Powerupcloud, extensively use Sensu for monitoring the 50+ client environments we manage — which are of all flavors and sizes. Together with Grafana for graphs, we found it to be a great monitoring platform. Though Sensu’s documentation is pretty comprehensive, we did spend some time figuring out things during the initial setup. After multiple deployments of Sensu for wide variety of environments, our engineers grew expertise with it and we thought a clear and concise set of instructions would be useful for someone starting afresh. So what follows is a step by step for -
- Sensu Installation and configuration
- Uchiwa Dashboard Setup
- Configure plugins, sample checks and a sensu client
- Graphite and Grafana installation
- Rendering Grafana graphs in Uchiwa
- Monitoring a windows machine using Sensu
So What is Sensu?
Sensu is a modern open source push based monitoring tool. It’s written in ruby. It is well suited for modern cloud infrastructure which is elastic and dynamic.Sensu messages are passed via rabbitmq message broker. Redis is used to store data. You can use sensu to monitor servers, services, process, application health and business KPI’s. Sensu supports plugins from are nagios, shell scripts, perl, ruby, zabbix, icinga, etc. Sensu is a best replacement for Nagios, if you are running into issues of scale due to pull based natured of Nagios monitoring.
Sensu Architecture
Below is an architecture diagram that depicts how Sensu works

The animation below does a great job of explaining Sensu monitoring flow

Lets now get started with the setup.
Sensu Master Installation
For the sake of simplicity, this guide assumes that you are using an Ubuntu instance to run your Sensu master.
Install the GPG public key
wget -q http://sensu.global.ssl.fastly.net/apt/pubkey.gpg -O- | sudo apt-key add -
Create an APT configuration file at
/etc/apt/sources.list.d/sensu.listecho "deb http://sensu.global.ssl.fastly.net/apt sensu main" | sudo tee /etc/apt/sources.list.d/sensu.list
Update APT and Install Sensu
sudo apt-get update && sudo apt-get install sensu
Client Configuration Copy the following contents to a configuration file located at
/etc/sensu/conf.d/client.json{
"client": {
"name": "sensu-server",
"address": "127.0.0.1",
"environment": "sensu",
"subscriptions": [ "linux"],
"keepalive":
{
"handler": "mailer",
"thresholds": {
"warning": 250,
"critical": 300
}
},
"socket": {
"bind": "127.0.0.1",
"port": 3030
}
}
}
At minimum, all of the Sensu processes require configuration to tell them how to connect to the configured Sensu Transport.
Copy the following contents to a configuration file located at
/etc/sensu/conf.d/transport.json{
"transport":
{
"name": "rabbitmq",
"reconnect_on_error": true
}
}
Copy the following contents to an api configuration file located at
/etc/sensu/conf.d/api.json{
"api":
{
"host": "localhost",
"bind": "0.0.0.0",
"port": 4567
}
}
Install Redis
Install Redis using APT
sudo apt-get -y install redis-server
Copy the following contents to a configuration file located at
/etc/sensu/conf.d/redis.json{
"redis":
{
"host": "127.0.0.1",
"port": 6379
}
}
Install Erlang
Add the Erlang Solutions APT repository
sudo wget http://packages.erlang-solutions.com/erlang-solutions_1.0_all.deb sudo dpkg -i erlang-solutions_1.0_all.deb sudo apt-get update sudo apt-get -y install erlang-nox
Install RabbitMQ
Download the official RabbitMQ 3.6.0 .deb installer package
sudo wget http://www.rabbitmq.com/releases/rabbitmq-server/v3.6.0/rabbitmq-server_3.6.0-1_all.deb
Install the package using dpkg
sudo dpkg -i rabbitmq-server_3.6.0-1_all.deb
Copy the following contents to a configuration file located at
/etc/sensu/conf.d/rabbitmq.json{
"rabbitmq":
{
"host": "127.0.0.1",
"port": 5672,
"vhost": "/sensu",
"user": "sensu",
"password": "secret"
}
}
Start the services
service sensu-server start && service sensu-client start && service rabbitmq-server start && service redis-server start && service sensu-api start
Create a dedicated RabbitMQ vhost for Sensu
sudo rabbitmqctl add_vhost /sensu
Create a RabbitMQ user for Sensu
sudo rabbitmqctl add_user sensu secret sudo rabbitmqctl set_permissions -p /sensu sensu ".*" ".*" ".*"
Install Uchiwa
Install Uchiwa dashboard
sudo apt-get install uchiwa
Replace the configuration in
/etc/sensu/uchiwa.json{
"sensu": [
{
"name": "sensu",
"host": "localhost",
"port": 4567,
"timeout": 10
}
],
"uchiwa": {
"host": "0.0.0.0",
"port": 8080,
"refresh": 10
}
}
Start the service
sudo service uchiwa start
Install Sensu Plugins
Go to the following location and run the commands to install sensu plugins
cd /opt/sensu/embedded/bin/sensu-install -p cpu-checks
sensu-install -p disk-checks
sensu-install -p memory-checks
sensu-install -p nginx
sensu-install -p process-checks
sensu-install -p load-checks
sensu-install -p vmstats
sensu-install -p mailer
Copy the following contents to a CPU check configuration file located at
/etc/sensu/conf.d/check_cpu_linux.json{
"checks": {
"check-cpu-linux": {
"handlers": ["mailer"],
"command": "/opt/sensu/embedded/bin/check-cpu.rb -w 80 -c 90 ",
"interval": 60,
"occurrences": 5,
"subscribers": [ "linux" ]
}
}
}
Copy the following contents to a memory check configuration file located at
/etc/sensu/conf.d/check_memory_linux.json{
"checks": {
"check_memory_linux": {
"handlers": ["mailer"],
"command": "/opt/sensu/embedded/bin/check-memory-percent.rb -w 90 -c 95",
"interval": 60,
"occurrences": 5,
"subscribers": [ "linux" ]
}
}
}
Copy the following contents to a disk check configuration file located at
/etc/sensu/conf.d/check_disk_usage_linux.json{
"checks": {
"check-disk-usage-linux": {
"handlers": ["mailer"],
"command": "/opt/sensu/embedded/bin/check-disk-usage.rb -w 80 -c 90",
"interval": 60,
"occurrences": 5,
"subscribers": [ "linux" ]
}
}
}
Enable alerts
Install postfix (MTA) to send alert mails
apt-get install postfix
Copy the following contents to a pipe handler configuration file located at
/etc/sensu/conf.d/ handler_mail.json{
"handlers": {
"mailer": {
"type": "pipe",
"command": "/opt/sensu/embedded/bin/handler-mailer.rb"
}
}
}
Copy the following contents to a mailer configuration file located at
/etc/sensu/conf.d/mailer.json{
"mailer": {
"admin_gui": "http://yoursensuserverip:8080/",
"mail_from": "alerts@powerupcloud.com",
"mail_to": "alerts@powerupcloud.com",
"smtp_address": "localhost",
"smtp_port": "25",
"smtp_domain": "localhost"
}
}
Note : Change your mailing address according to your needs.
Restart the sensu server to update the configurations
service sensu-server restart
Enable sensu services to start automatically
sudo update-rc.d sensu-server defaults
sudo update-rc.d sensu-client defaults
sudo update-rc.d sensu-api defaults
sudo update-rc.d uchiwa defaults
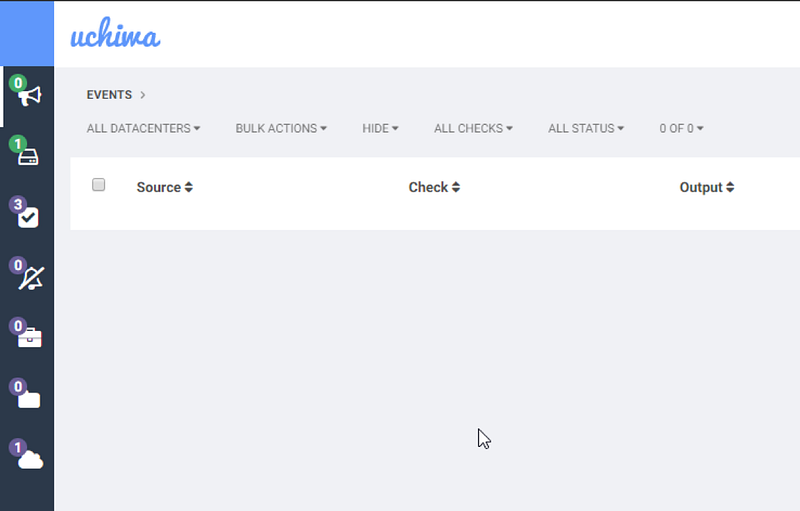
At this point, you can access Sensu dashboard at http://sensuserver-ip-address:8080
What is Graphite?
Graphite is used to store metrics. It does not provide a facility for collecting metrics. It only receive the metrics from different platform. It’s made up of three major components.
1.Carbon — A high-performance service that listens for time-series data 2. Whisper — A simple database library for storing time-series data
3. Django — Graphite’s user interface & API for rendering graphs and dashboards (web frontend)
Installing Graphite
Install carbon. The default carbon configuration stores only one day. If you need to customize adjust the Retention rates.
apt-get install -y graphite-carbon
echo "CARBON_CACHE_ENABLED=true" > /etc/default/graphite-carbon
service carbon-cache start
Install the web frontend
apt-get install -y graphite-web apache2 libapache2-mod-wsgi
chown _graphite /var/lib/graphite
sudo -u _graphite graphite-manage syncdb --noinput
rm -f /etc/apache2/sites-enabled/000-default.conf
cp /usr/share/graphite-web/apache2-graphite.conf /etc/apache2/sites-enabled/graphite.conf
service apache2 restart
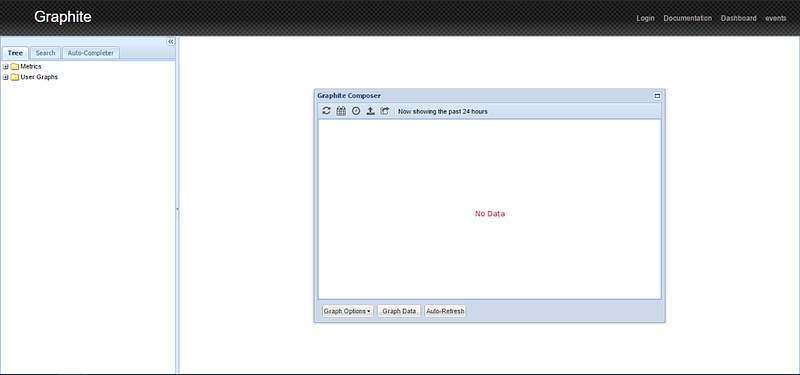
At this point, you can access Graphite dashboard at http://sensuserver-ip-address
What is grafana?
Grafana provides a powerful and easy way to create, explore, and share dashboards. It provides rich graphing experience.
Install Grafana
Install grafana to visualize the metrics. Add the following line to your
/etc/apt/sources. list file.deb https://packagecloud.io/grafana/stable/debian/ jessie main
Then add the Package Cloud key. This allows you to install signed packages.
curl https://packagecloud.io/gpg.key | sudo apt-key add –
Update your Apt repositories and install Grafana
sudo apt-get update sudo apt-get install grafana
At this point, you can access Grafana dashboard at http://sensuserver-ip-address:3000

Note The default username and password is “admin”, without quotes.
Install WizardVan : A Sensu Metrics Relay
Install git and clone metric relay.
apt-get install -y git
git clone git://github.com/opower/sensu-metrics-relay.git
cd sensu-metrics-relay
cp -R lib/sensu/extensions/* /etc/sensu/extensions
Create
/etc/sensu/conf.d/relay.json with the following contents{
"relay": {
"graphite": {
"host": "localhost",
"port": 2003
}
}
}
Enable metrics checks
Copy the following contents to a vmstat metric check configuration file located at
/etc/sensu/conf.d/metrics-vmstat.json{
"checks": {
"metric-vmstat": {
"type": "metric",
"command": "/opt/sensu/embedded/bin/metrics-vmstat.rb",
"subscribers": ["linux"],
"interval": 20,
"handlers": ["relay"]
}
}
}Sensu Client Installation
Install Sensu using APT
Install the GPG public key
wget -q http://sensu.global.ssl.fastly.net/apt/pubkey.gpg -O- | sudo apt-key add -
Create an APT configuration file at
/etc/apt/sources.list.d/sensu.listecho "deb http://sensu.global.ssl.fastly.net/apt sensu main" | sudo tee /etc/apt/sources.list.d/sensu.list
Update APT and Install Sensu on client
sudo apt-get update sudo apt-get install sensu
Client configuration
Copy the following contents to a client configuration file located at
/etc/sensu/conf.d/client.json{
"client": {
"name": "Sensu-client",
"address": "0.0.0.0",
"subscriptions": [ "linux" ],
"keepalive": {
"handler": "mailer",
"thresholds": {
"warning": 250,
"critical": 300
},
"refresh": 90
}
}
}
Note Change your client IP address in address section Copy the following contents to a rabbitmq configuration file located at
/etc/sensu/config.json{
"rabbitmq": {
"host": "0.0.0.0",
"vhost": "/sensu",
"user": "sensu",
"port": 5672,
"password": "secret"
}
}
Note Change your server IP address in address section Go to the following location and run the commands to install sensu plugins
cd /opt/sensu/embedded/bin/
sensu-install -p cpu-checks
sensu-install -p disk-checks
sensu-install -p memory-checks
sensu-install -p nginx
sensu-install -p process-checks
sensu-install -p load-checks
sensu-install -p vmstats
Start your sensu client
service sensu-client start
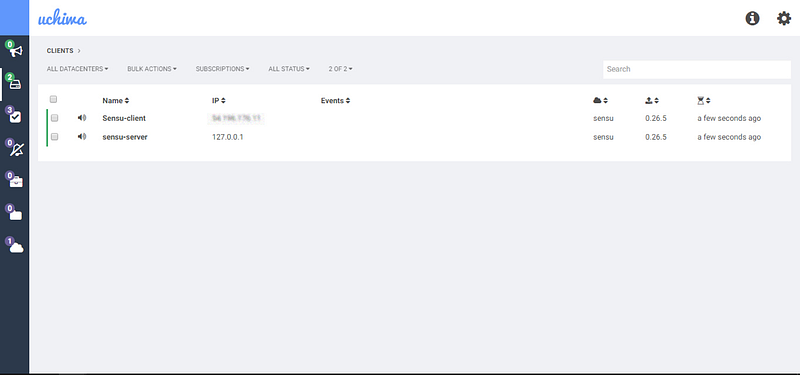
Within a minute you sensu client will start reporting to sensu server.
Add a Graphite Data Source to Grafana
Login to grafana using the default credentials
admin/admin. Click on that data sources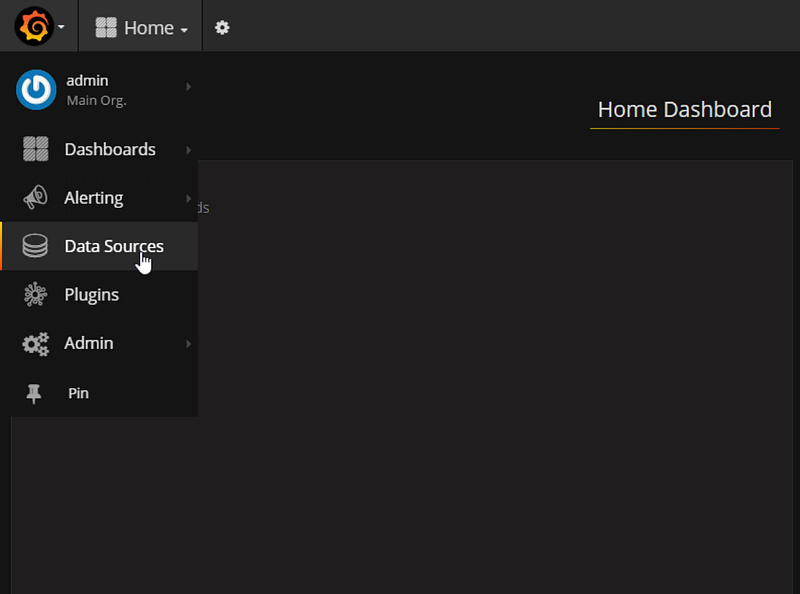
Choose add data source and fill the details as shown in the screenshot below

Create a new dashboard by clicking the Dashboards -> New

Click on graph icon to create a new graph
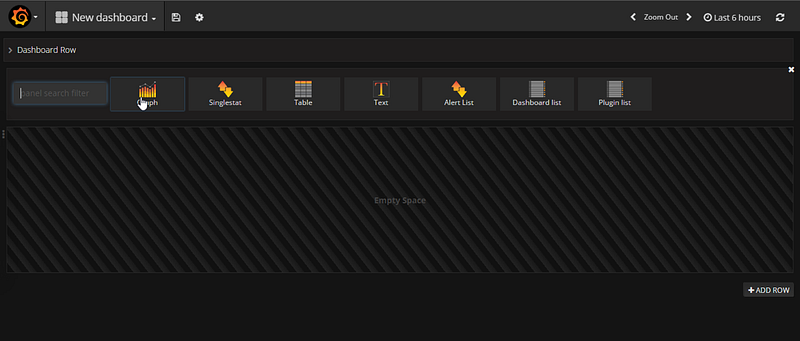
Once the example graph appears click on Edit.

Choose the panel data source to graphite

Once you add the source from graphite you can choose the data from graphite as given below
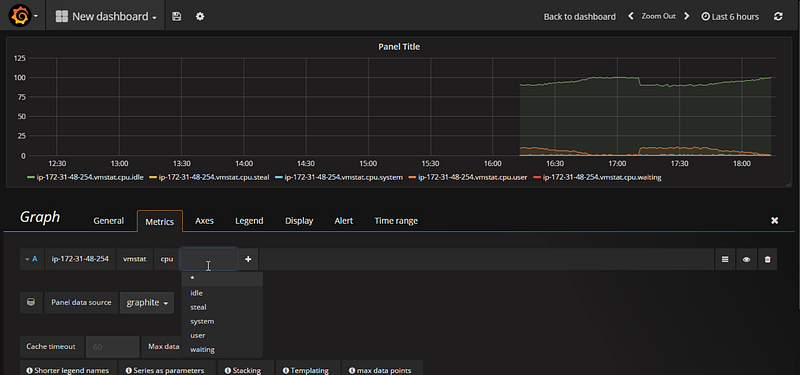
You can customize the graph like below

Get your rendering link in grafana using the following steps

Click on direct link rendered image to get rendered link for graphs
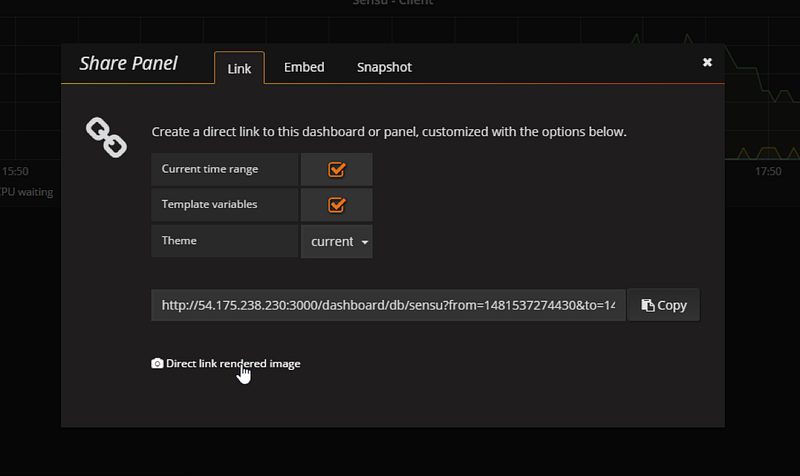
Choose the time range to render the images. For example I need last one hour metric. get the Rendered link like given below.
http://yoursensu-server-ip:3000/render/dashboardsolo/db/sensu?from=now1h&to=now&panelId=1&width=1000&height=500
http://yoursensu-server-ip:3000/render/dashboardsolo/db/sensu?from=now1h&to=now&panelId=1&width=1000&height=500
Create the following contents to a CPU check standalone configuration in sensu client file located at
/etc/sensu/conf.d/check_memory_linux.json{
"checks": {
"check_memory_linux": {
"handlers": ["mailer"],
"command": "/opt/sensu/embedded/bin/check-memory-percent.rb -w 80 -c 90 ",
"interval": 60,
"occurrences": 5,
"refresh": 1800,
"subscribers": [ "linux" ],
"standalone": true,
"check-memory":"http://54.175.238.230:3000/render/dashboard-solo/db/sensu?panelId=1&from=now-1h&to=now&tab=display&width=1000&height=500&uchiwa_force_display_as_image=.jpg"
}
}
}
Note Add
&uchiwa_force_display_as_image=.jpg at the end of your rendering link to force display in uchiwa as image instead of displaying link.
Restart the sensu client to update configurations
sudo sensu-client restart
Once you restart the sensu you can see grafana graphs rendered in uchiwa dashboard.

Monitoring a Windows Client Using Sensu
Sensu is a first class citizen on Linux. How about Windows? Can you monitor? Turns out you can and we do.
Download Sensu from the Sensu Downloads page, or by simply using This Link. To start the installation pre-requisite steps double-click the
sensu-0.26.5-1.msi installer package to launch the installer.
Sensu setup wizard will be open. Click Next to begin and accept license etc. Don’t change the default sensu installation path,
Because sensu searches and loads the configuration files from the default parent location
Because sensu searches and loads the configuration files from the default parent location
C:/opt.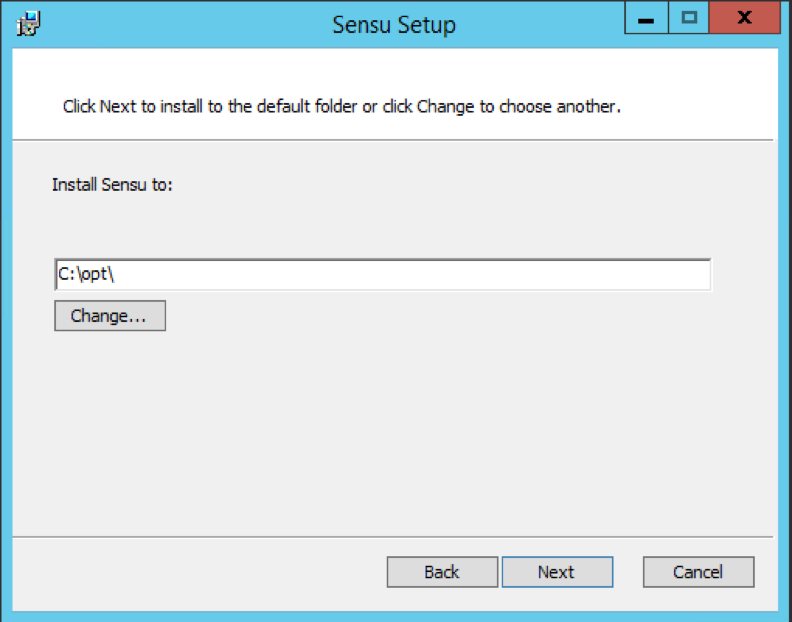

Configuring the Sensu Client
There is no
default configuration is provided with Sensu. Sensu Client will not start without the following two essential elements.- Transport definition
- Client definition
Sensu services on Microsoft Windows systems will load configuration from the following locations.
C:\opt\sensu\config.json C:\opt\sensu\conf.d\ #The user is supposed to create this directory
Create the Sensu configuration directory
Open the command prompt as Administrator. create the directory,
mkdir C:\opt\sensu\conf.d\
Client Definition
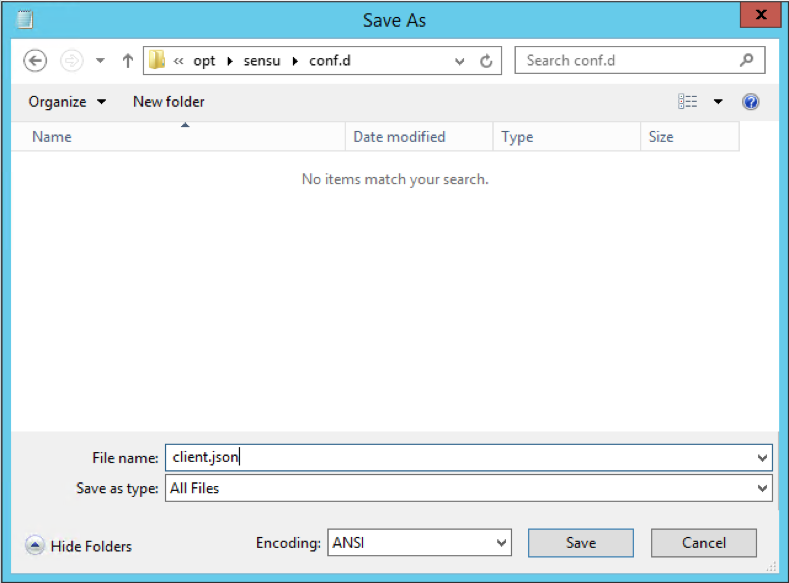
Copy and Paste the following contents to the client configuration file,
C:\opt\sensu\conf.d\client.json{
“client”: {
“name”: “My-client”,
“address”: “10.0.0.0”,
“keepalive”:
{
“handler”: “mailer”,
“thresholds”: {
“warning”: 250,
“critical”: 300
}
},
“subscriptions”: [“windows”]
}
}
Save the file as “client.json” and choosing Save as type: All Files as mentioned below.
Transport Configuration
RabbitMQ is a message broker which plays a vital role in Sensu server and Sensu client communication. Sensu check requests and check results are published as “messages” to the Sensu Transport.
Then corresponding Sensu services receive these messages by subscribing to the appropriate subscriptions. Copy and Paste the following contents to the transport authentication configuration file,
C:\opt\sensu\config.json{
"rabbitmq": {
"host": "<sensu-server’s ip here>",
"vhost": "/sensu",
"user": "sensu",
"password": "sensu"
}
}
Save the file as
config.json and choosing Save as type: All Files as mentioned below.
Copy and Paste the following contents to the transport configuration file,
C:\opt\sensu\transport.json{
"transport": {
"name": "rabbitmq",
"reconnect_on_error": true
}
}
Use of this file is to connect to transport automatically if it loses its connection with transport due to any errors.
Configure the Sensu client Windows service wrapper
To add the Sensu Client as a Windows service, Sensu MSI package provides service wrapper XML file to accomplish it. Just copy the below content and paste it in,
C:\opt\sensu\bin\sensu-client.xml<!--
Windows service definition for Sensu
-->
<service>
<id>sensu-client</id>
<name>Sensu Client</name>
<description>This service runs a Sensu client</description>
<executable>C:\opt\sensu\embedded\bin\ruby</executable>
<arguments>C:\opt\sensu\embedded\bin\sensu-client -c C:\opt\sensu\config.json -d C:\opt\sensu\conf.d -l C:\opt\sensu\sensu-client.log</arguments>
</service>
Service wrapper uses the XML file and loads the configuration files from that file. So make sure you have provided the absolute path of configuration files. Otherwise Sensu Client will not start and throws you the startup error.
Install Sensu Client As a Service
This is pretty easy. Just execute this command on a cmd with elevated privileges
sc create sensu-client start= delayed-auto binPath= c:\opt\sensu\bin\sensu-client.exe DisplayName= "Sensu Client"
Once you created the service, You will find it in
services.msc as “Sensu Client”.
That’s it. You should now see the windows client sending data to Sensu master.
Install Sensu Client Windows Plugins
Download the plugins from this link. Extract the
sensu-plugins-windows-master zip file and copy the contents inside the bin folder.
Paste the copied files under,
C:\opt\sensu\plugins. By default unlike linux machines there is no plugins folder available. User need to create it.
Thats about it! Happy monitoring! :)
Comments
Post a Comment