Connecting Clouds — AWS to Azure Site to Site VPN Step by Step
Written By: Karthik AU, Cloud Engineer at Powerupcloud.
One of our customers run massive fleet of servers spread across AWS and Azure and it was necessary for us to establish a reliable tunnel between AWS and Azure for secure access. This post has a detailed step by step of establishing this connectivity.
We are going to configure RRAS on windows server 2012 R2 on AWS and on the Azure side, we will configure the VNet Gateway for connectivity. So lets take a look at the steps below
Pre-requisites
On Azure
- Virtual network gateway
- Local network gateway
- Virtual network
- Ubuntu instance (to test the connectivity)
- Make sure you disable the firewall on instance that we create for test.
On AWS
- VPC
- Windows Server 2012 R2 Datacentre
- Ubuntu instance (to test the connectivity)
- Make sure to disable the firewall on instance that we create for test.
Steps to configure
- Let’s start with getting things configured on AWS platform. First let’s configure VPC with following details
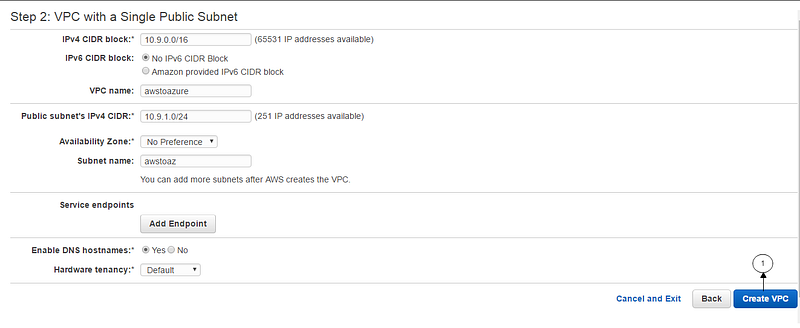
- Name : awstoazure
- Address space : 10.9.0.0/16
- Subnet name : awstoaz
- CIDR : 10.9.1.0/24
Login to AWS console and select services, under services select VPC (marked in yellow)
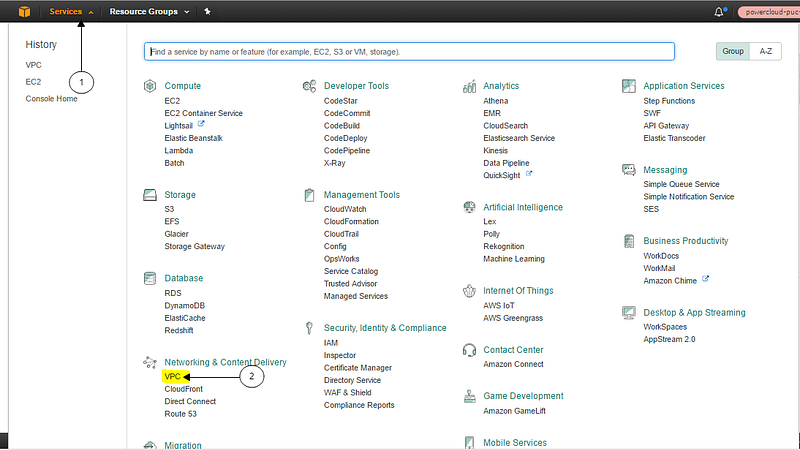
Select VPC Dashboard and then select start VPC Wizard

Select VPC with a Single Public Subnet

Fill in the address range and then click on Create VPC
Let’s ensure our VPC is connected to internet Gateway

Once our VPC configured. Let’s allocate an elastic IP. In the VPC dashboard, click Elastic IPs, allocate New Address and click Yes, Allocate

- Now we have a VPC configured and an Elastic IP ready. Next we’ll deploy an EC2 instance.
- A Windows Server 2012 R2 instance
- We have used t2.micro instance
- Ensure that Auto-assign Public IP is enabled.
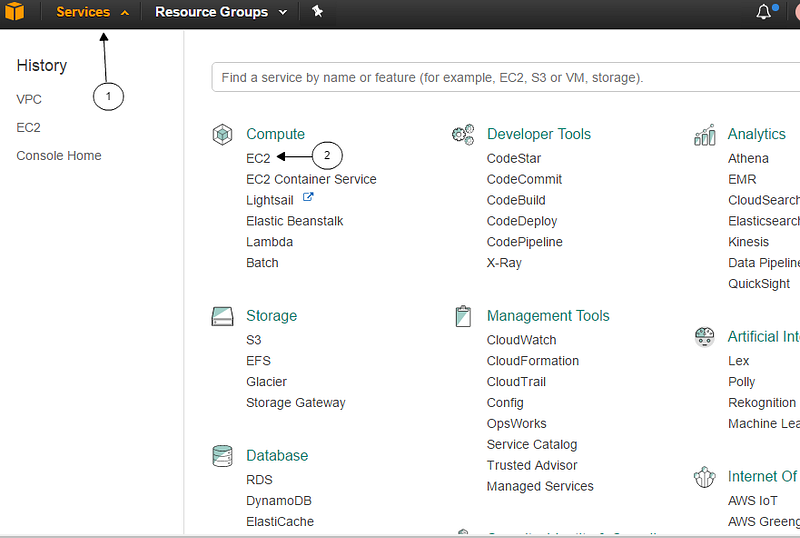
To create an EC2 instance, Click on services and there select EC2 under Compute section
Select the required image, instance size as mentioned earlier
In configuration section make sure you select the correct VPC and subnet. Once done click on Review and launch.

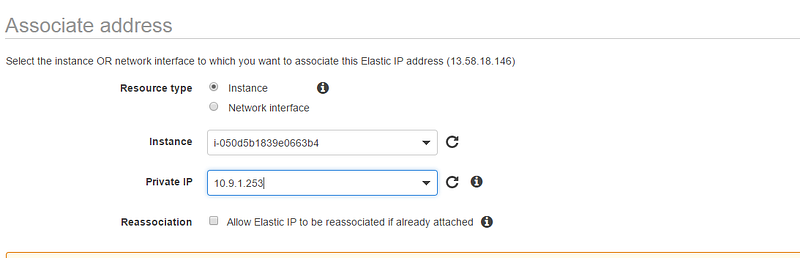
- Once the instance is running associate the Elastic IP we created earlier to the Network interface of the instance. By clicking Elastic IPs in the VPC dashboard, selecting Associate Address in the actions menu, selecting the Network interface used by the Windows Server 2012 R2 Datacentre instance we created earlier and click associate.

Fill in the following details and click on associate.
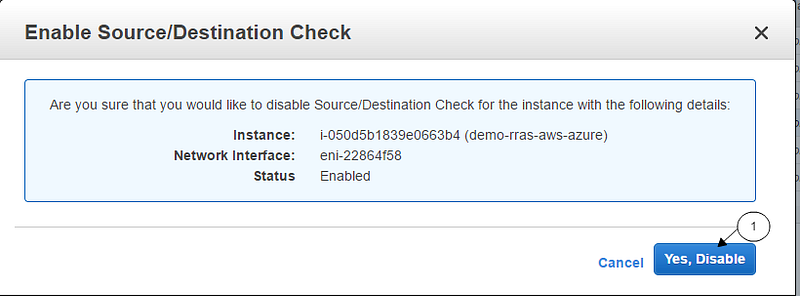
- Next, let’s disable source/destination checking on the server.

- Let’s add our Azure VNET address prefix in our RRAS server’s route table. This is to route the incoming traffic from Azure network to AWS internal network.

Now we are good with initial configuration on AWS platform. Let’s start with getting things configured on Azure platform.
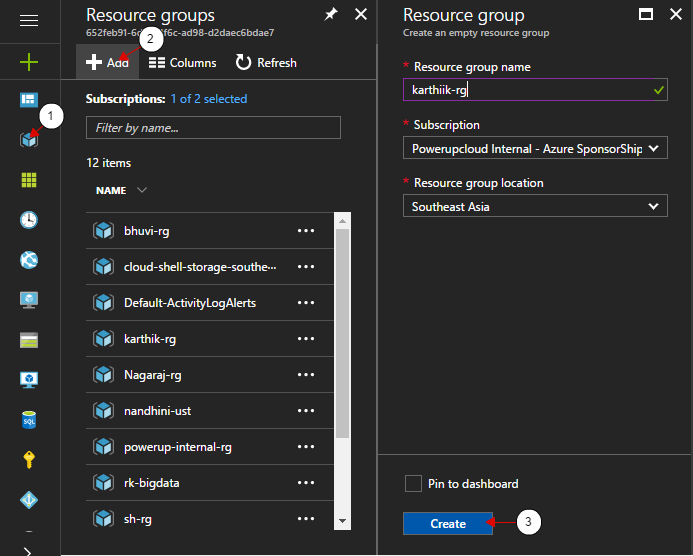
- Let’s login to Azure subscription, let’s start with creating a resource group.
- Next we’ll create a virtual network with following details
- Name : azure-to-aws
- Address space : 10.19.0.0/16
- Subnet name : azure-aws-sub
- CIDR : 10.19.1.0/24
- Resource group : we created in previous step

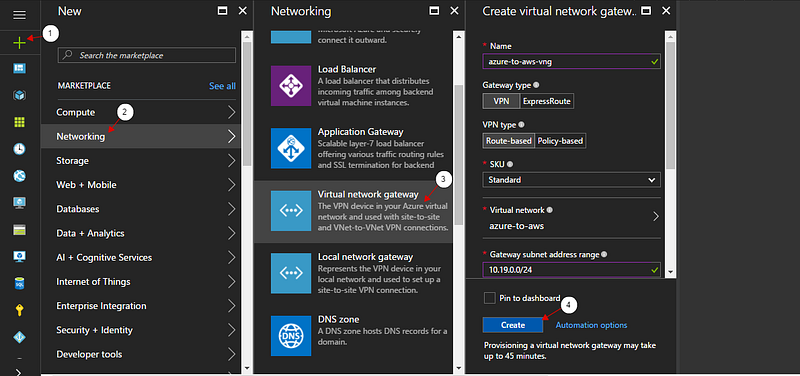
- Now we have our virtual network ready. Let’s get started with configuring VPN on Azure. First let’s start with configuring virtual network gateway.
- Make sure you select the VNET that we created in previous step.
- Make sure you select the resource group that we created at beginning.
- For provisioning the virtual network gateway it would take approximately 45 minutes.
- Since it takes time to create virtual network gateway. Meanwhile we can configure local network gateway (here we define AWS address space and also the public IP of VPN server on AWS).
- Give the IP of VPN server (RRAS configured server) on AWS.
- In address space give the VPC range of AWS.
- Use the same resource group.

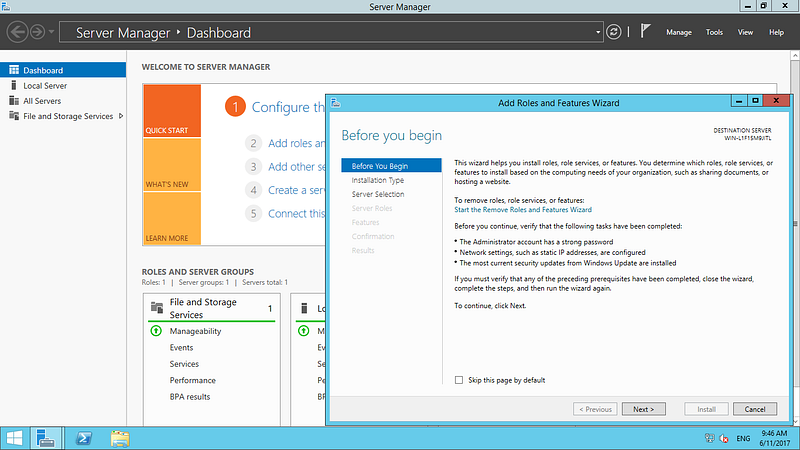
- Let’s configure RRAS on the instance that we created in AWS (windows server 2012 R2 datacentre). Login to the serve.
- Click on server manager
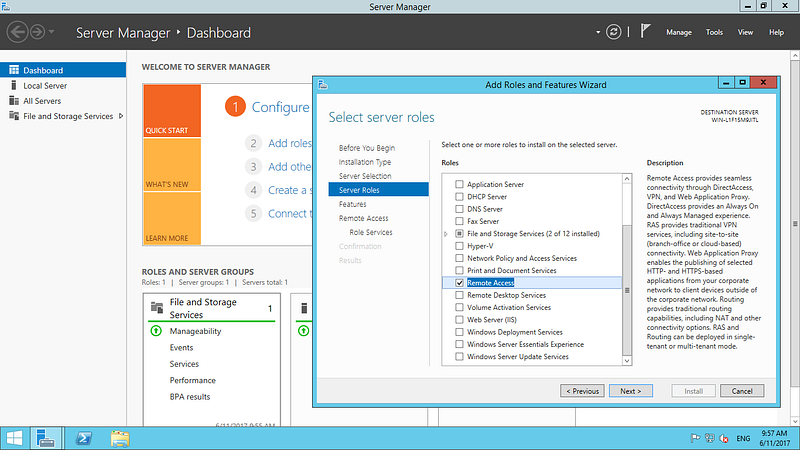
- Select the option Add roles and features. Add roles screen pops up click on next.
- Under Installation type and server selection keep the default settings and click on next. Under server roles select remote Access and click next.
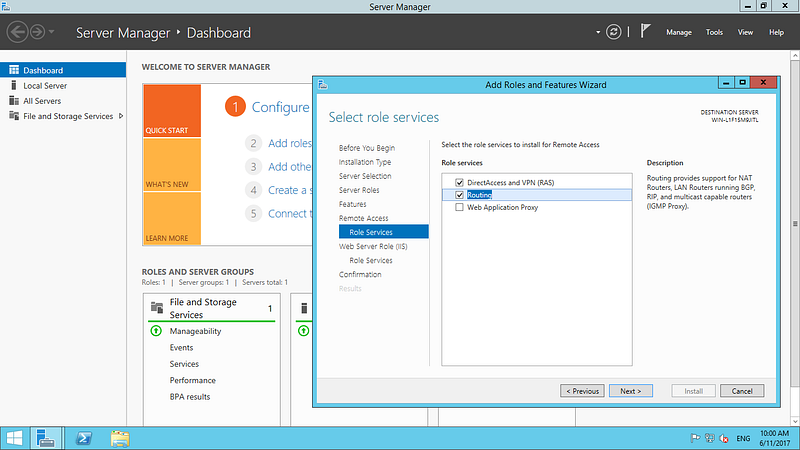
- Under features and Remote access keep the default settings and click next. Under Role service select Direct Access and VPN and Routing and click next.
- Keep the default setting and click next until you get an option to select install. Click on install.

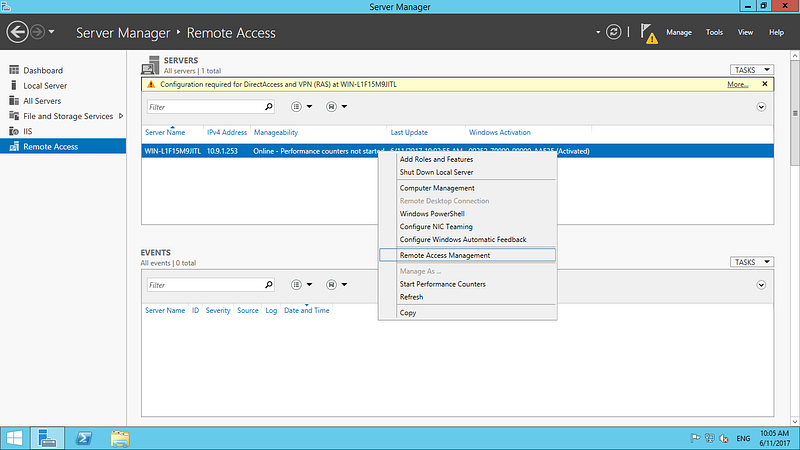
- Once the installation is completed. Open server manager and then select remote access option on left hand side. Next right click on server and then select remote access management. This redirects us to RRAS configuration panel.
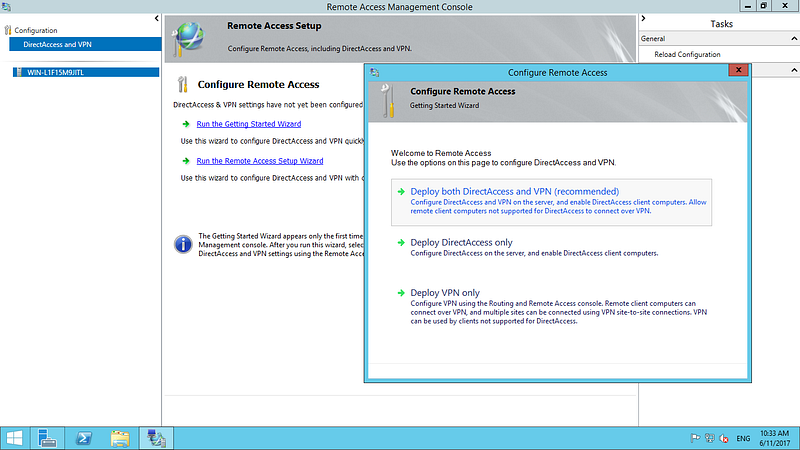
- Click on Direct access and VPN and then click on Run the Getting Started Wizard. Wizard pops up and then select last option Deploy VPN only.
- Routing and Remote access pane opens. Right click on the server and then select Configure and Enable Routing and Remote access.

- Click next. Under configuration select custom configuration and click next.

- Under custom configuration, select VPN access. And then click on finish.

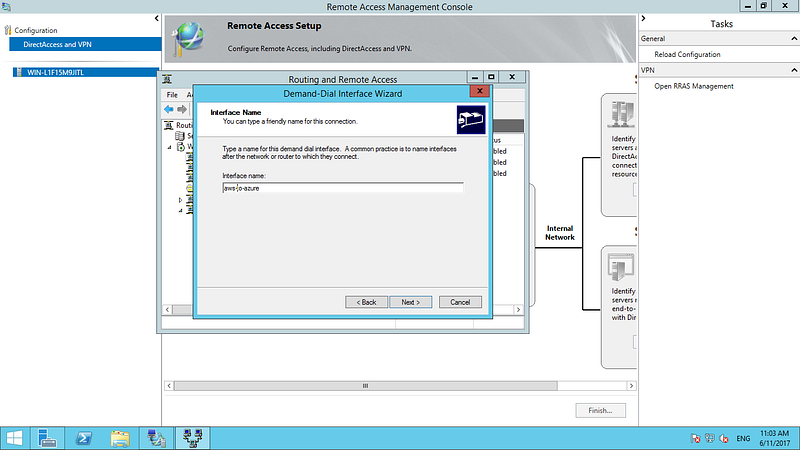
- Now we have our RRAS installed. Let’s add our azure IP to be allowed. For that right click on Network interface and the select first option. A wizard pops up. Click on next

- Give an interface name and then click next. Under connection type keep default setting and then click next.
- Under VPN type select IKEv2 option and click next.

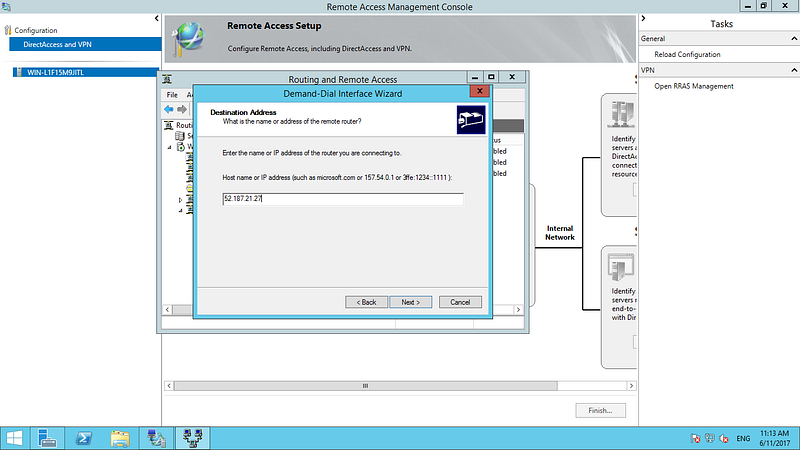
- Under destination address give the Azure gateway IP address and click next. Under protocol and security keep default setting and click next.
- Under static route for remote network add the Azure VNET address prefix. And then click on next. And then keep rest of them with default configuration.

- Now right click on created network interface and then select properties.

- Next select security option on tab, there on bottom of screen select the option pre-shared key and give a pre-shared key and click ok.

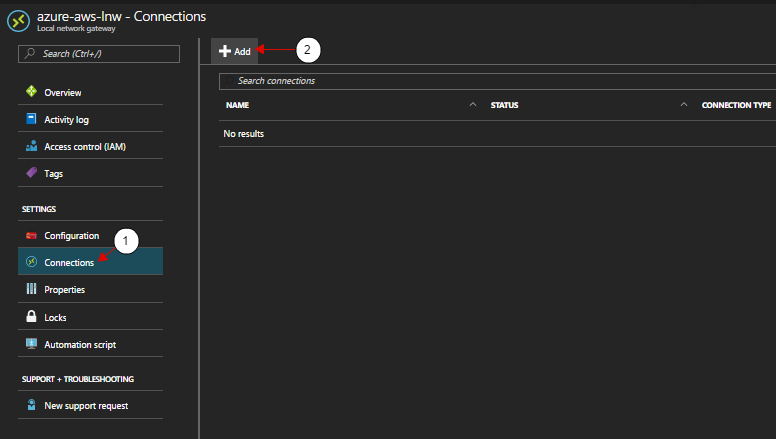
- Now we have our RRAS server that acts as VPN on AWS. Lest go to Azure subscription and establish the connection. Login to Azure subscription. Get into your resource group and there select Local Network Gateway that we had configured in our previous step.

- Under the local network gateway, select configuration on left hand pane and there select add to add the configuration.
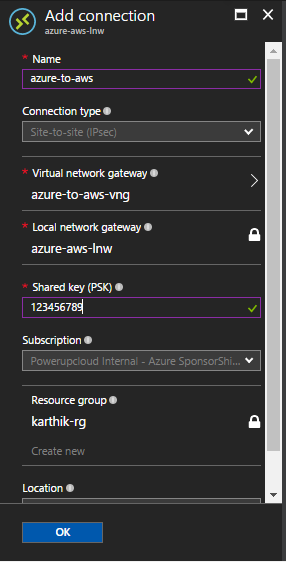
- Now add in the following configuration
- Select the virtual network gateway that we created before.
- Make sure you give the same pre-shared key that we had given on RRAS server present on AWS platform.
- Now let’s Login to RRAS server on AWS end and let’s establish a VPN. In RRAS server right click on network interface that we created earlier and then select connect option.
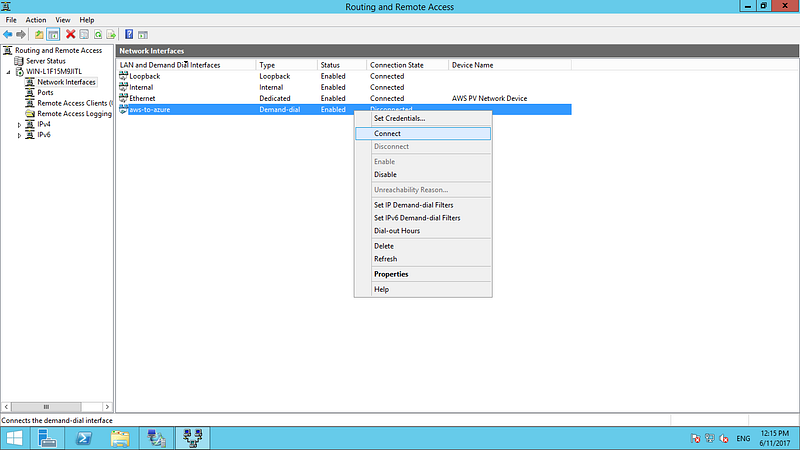
Now let’s check the VPN status, we have our VPN connection status connected from AWS end.

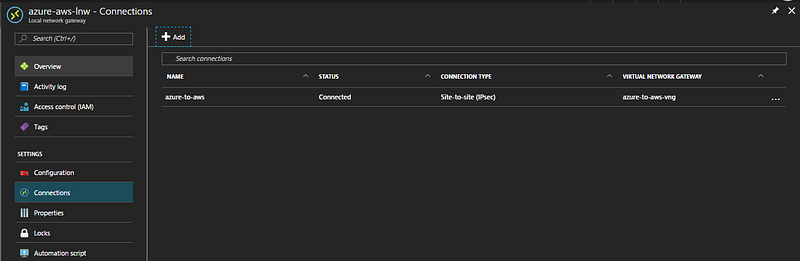
Let’s check connection from Azure end and we have status showing From Azure end as well.
Let’s deploy the VM’s on AWS platform and also on Azure platform and then we’ll try to ping from both the end using their private IP’s.
We have an Azure Instance with IP: 10.19.1.4 (Ubuntu 14)
We have an AWS Instance with IP: 10.9.1.136 (Ubuntu 14)
Now let’s try to ping AWS instance from Azure instance with private IP. We are able to ping.

Now let’s try to ping Azure instance from AWS instance with private IP. We are able to ping.

Hope you found it useful!

Comments
Post a Comment